Friday, September 18, 2009

The Swine Flu is Coming, Part I

Seems like we've been hearing a lot about the Swine Flu lately. Some large local institutions are making contingency plans based on as much as 50% of the population becoming infected this fall/winter.

For some reason, the swine flu seems to engender a panic that other infectious diseases - such as the "regular" flu - don't seem to. Part of me thinks it's all overblown. But another part of me thinks, better to prepare than to panic. And better to even over-prepare than to be sorry.

For myself, I think a very important part of preparing is doing everything you can to be in the best possible health - including pumping up the immune system and cleansing the digestive system. Diet is a prime factor in this. Lots of fresh fruits and vegetables plus a high-fiber diet are key.

So a part of my personal strategy is to have a Green Drink each day. (No one else in my family will drink them, and I don't force the issue. But I figure if anyone needs to not "go down" should there be a pandemic, it's me, the mother. So I drink Green Drinks regularly.)

This is what I do.

When I go grocery shopping, I buy a bunch of red chard and a bunch of kale. (Spinach, beet greens, collards, any other dark leafy green would work as well.)

I chop them up, rinse them thoroughly, and spin them dry in my salad spinner.
Then I mix them together in a large bowl.


Last, I package them in 1-gallon zip loc bags, which I keep in the fridge.


Then it's easy to prepare my green drink in my high-speed (K-tec) blender:

1. Put in 1-2 C of water.

2. Put in a large handful or two of greens.

3. Add a banana and other fruits (I like an apple and frozen blueberries. But I also use peaches, strawberries, and whatever I have on hand).

4. Blend on the "Whole Food" setting.

This produces a thick greenish-brown drink about the consistency of V-8. It has your full day's allowance of fresh fruits and vegetables (about 2 servings veggies, and 3 servings fruits, depending on what you add). My family thinks it's disgusting, but I have grown to really like it. I notice that when I drink my Green Drink, I feel better and have more energy. I think it will help me to stay healthy - or at least healthier - in the event of a swine flu outbreak as well.

Monday, August 24, 2009

Another T-shirt Makeover

Here's another T-shirt makeover to create a shirt for my daughter (she does like this one - wore it to school today. I had to modify the sleeves a little first, however - took a little off the bottom to make them tighter).


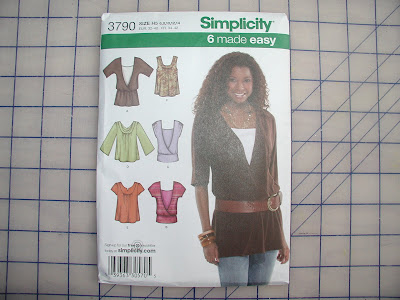
It was done almost exactly the same way as the one in the previous post. Here's the pattern:

I used another XXL t-shirt from my stash (purchased at the same yard sale, also for 25 cents, making the cost of this shirt $1.25 - $1 for the pattern, 25 cents for the t-shirt). As a quick reminder:

1. Cut the sleeves off the t-shirt, cut the shoulder seams, cut one side seam, to make the t-shirt lie flat.

2. Cut the pattern front and back from the t-shirt (fold as needed). Remember, you can use the existing hem from the t-shirt.

3. Cut the pattern sleeves from the t-shirt sleeves (cut the underarm seam of the sleeves first, to make them lie flat).

4. Sew the shirt as usual.

Sunday, August 23, 2009

T-shirt makeover

Shopping for school clothes with my teenage daughter - not fun! Neither of us have much patience with shopping. I haven't sewn for her for a long time, but after this shopping trip, I am ready to try again. (Sewing couldn't possibly be worse than shopping!)

Here is what I did.

1. Went to JoAnn's. Patterns were on sale for $1 each. Bought five patterns for what I thought were cute/stylish shirts. Figured that if she didn't like all of them, she would probably like some, and at $1/pattern I was willing to gamble.

2. Looked through my stash. Found a man's XXL t-shirt I bought at a yard sale for 25 cents, plus some white knit cloth I bought at DI. Here's the t-shirt:

3. Cut out the sleeves and cut up one side of the t-shirt (it was in a tube), cutting so as to avoid the stain on one side.


4. Carefully laid the front, back, and sleeves out on the t-shirt, then cut them out.

Front (placed so as to allow for using the hem that's already there):
Back: Sleeve (note that I changed the shape of the sleeve slightly, so I could use the hem)

5. Sewed the shirt as per the instructions:


6. Daughter didn't like it - "too much white, Mom." Couldn't re-do it - only scraps of fabric left over from the t-shirt. Ah-ha! There was enough to add a ruffle, to cover up some of the white (also to cover up the gathers in front, which came out uneven):


7. Daughter still doesn't love it. But she didn't love anything we saw when we were shopping either. Everything we saw shopping cost at least $10, and most things were $20-$30. This cost me about $1.50 to make.

She does like it enough to say, grudgingly, "Well, I'll wear it, Mom."

For myself, it was just a reminder - a little ingenuity can sometimes go a long way.